Looking for the perfect Filipino puto recipe? Puto, a soft, fluffy, and slightly sweet steamed rice cake, is a staple in Filipino cuisine. It is often served as a side dish or dessert during special occasions and family gatherings. Whether you are a beginner or an experienced cook, mastering the art of making puto is an essential part of appreciating Filipino culinary traditions.
In this guide, we’ll walk you through everything you need to know about how to make Filipino puto, including different variations, key ingredients, and tips for achieving the perfect texture. Let’s dive into this comprehensive Filipino puto recipe and enjoy this delightful dish at home.
What is Filipino Puto?

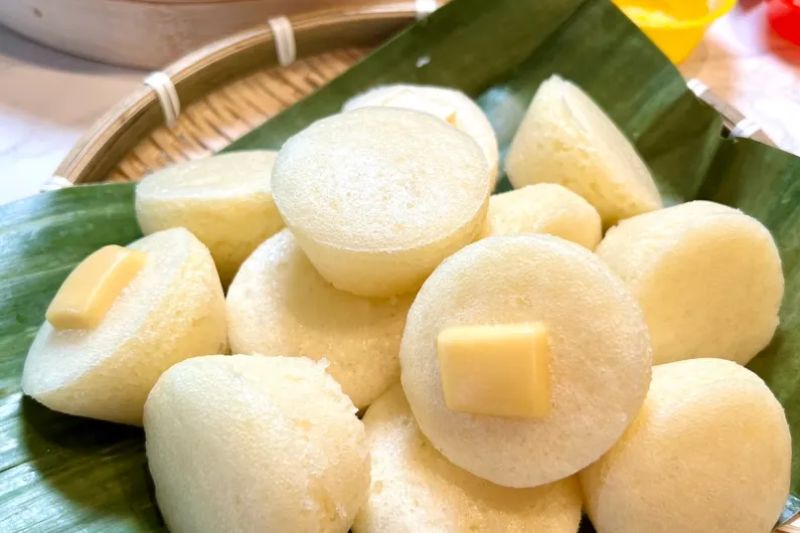
Puto is a traditional Filipino rice cake that’s soft, moist, and slightly sweet. The main ingredients are rice flour and sugar, and the batter is typically steamed in small molds, giving the cake its signature light and fluffy texture. While it’s often served alongside savory dishes like dinuguan (Filipino blood stew), puto can also be enjoyed on its own as a snack or dessert.
Ingredients in Filipino Puto

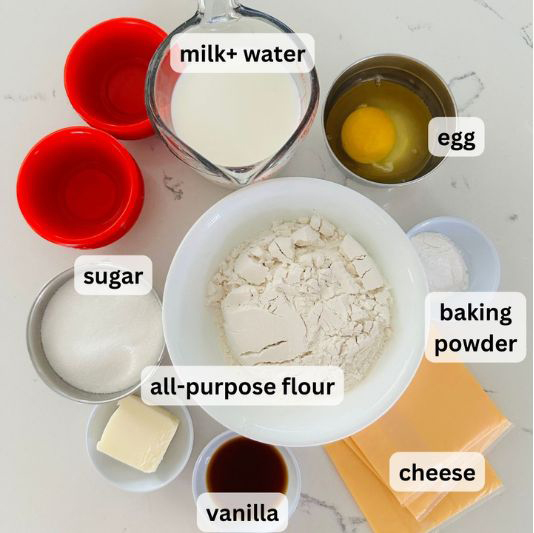
The beauty of this Filipino puto recipe lies in its simplicity. Below are the key ingredients that you’ll need:
- 1 cup rice flour – The star ingredient, traditionally used for making authentic puto.
- 1/2 cup sugar – Adds sweetness to balance the subtle flavor of the rice flour.
- 2 tsp baking powder – Ensures the puto rises and becomes fluffy.
- 1 cup coconut milk or water – Used for added richness and flavor. Some variations use evaporated milk.
- 1 egg (optional) – Contributes to the structure and moisture of the puto.
- 1/4 cup melted butter (optional) – Optional, but adds a delicious buttery taste.
- Cheese or salted egg for toppings (optional) – Common toppings for a savory twist.
Step-by-Step Guide to Making Filipino Puto

Making Filipino puto at home is a simple and rewarding process. Follow these detailed steps to ensure that your puto comes out perfectly soft, fluffy, and flavorful.
Step 1: Prepare the Batter
The foundation of delicious puto lies in the batter, which is easy to prepare with just a few basic ingredients.
- Combine the dry ingredients: In a large mixing bowl, whisk together 1 cup of rice flour, 1/2 cup of sugar, and 2 teaspoons of baking powder. Make sure everything is evenly distributed to avoid any lumps.
- Add the wet ingredients: Gradually pour in 1 cup of coconut milk or water, stirring constantly to ensure the batter remains smooth and lump-free. The coconut milk will give the puto a rich flavor, but if you prefer a lighter option, water works just as well.
- Optional enrichments: If you want a richer and more flavorful batter, beat 1 egg and melt 1/4 cup of butter. Add both to the batter and stir until fully incorporated. The egg will give the puto more structure and the butter adds a hint of indulgence.
- Final mix: Whisk the mixture until smooth. The batter should be slightly thick but pourable. Set aside for a few minutes to allow the baking powder to activate.
Step 2: Grease the Molds
To ensure your puto comes out clean and intact, greasing the molds is a crucial step.
- Choose your molds: You can use traditional aluminum puto molds or silicone molds, which are easier to handle and release the puto effortlessly.
- Grease lightly: Using a pastry brush or a clean paper towel, lightly grease the molds with a small amount of oil or butter. This will prevent the puto from sticking to the sides and make it easier to remove them once steamed.
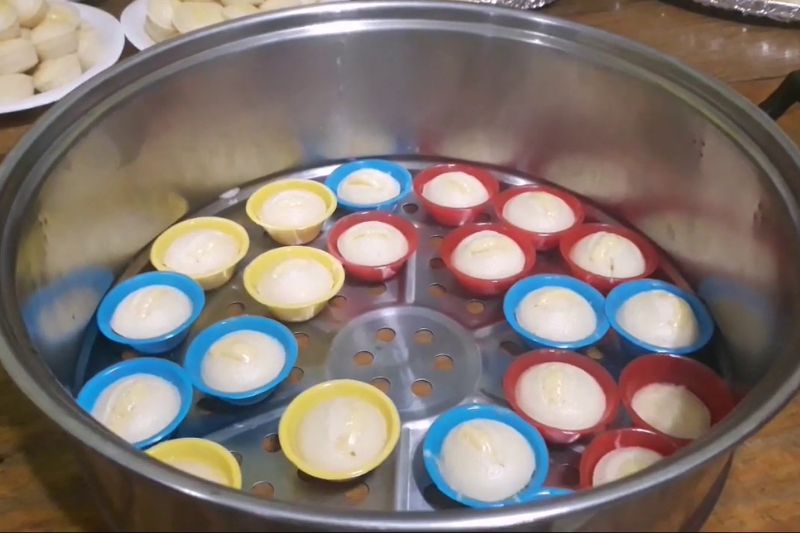
- Arrange in the steamer: Place the greased molds inside your steamer in a single layer, leaving enough space between each mold to allow steam to circulate evenly.
Step 3: Pour the Batter
With your molds prepared, it’s time to pour the batter.
- Fill the molds: Pour the batter into each mold, filling them about 3/4 full. This allows room for the puto to rise as it steams without overflowing. You can use a small ladle or measuring cup for even distribution.
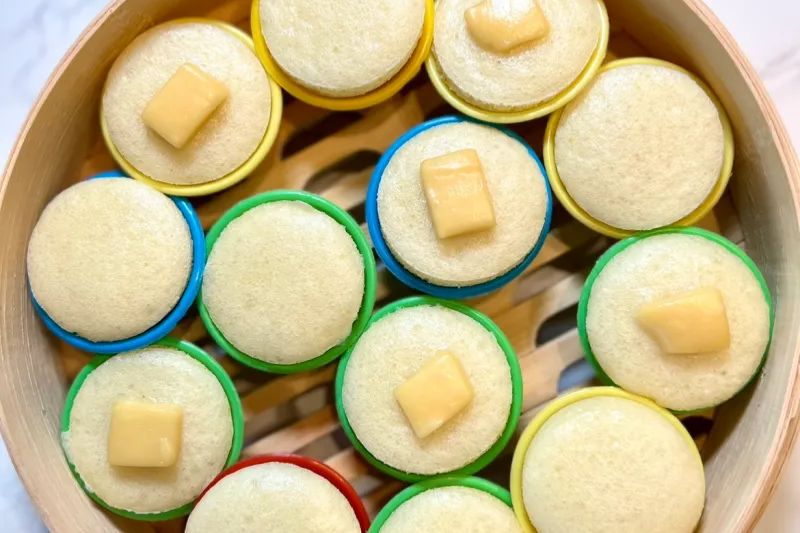
- Add toppings (optional): For a savory touch, you can top each puto with a small piece of cheese or a slice of salted egg before steaming. This will melt slightly and add a delicious contrast to the sweetness of the puto.
Step 4: Steam the Puto
Steaming is where the magic happens, transforming the batter into soft, fluffy puto.
- Prepare the steamer: Fill your steamer with enough water to last for 10-15 minutes of steaming, and bring it to a simmer. The water should be simmering but not boiling vigorously, as this could lead to uneven cooking or cracked puto.
- Steam over medium heat: Place the filled molds into the steamer basket. Cover the steamer with a lid, but wrap a kitchen towel around the lid to prevent condensation from dripping onto the puto, which could affect the texture.
- Check for doneness: Steam the puto for about 10-15 minutes, depending on the size of the molds. After 10 minutes, check if they’re done by inserting a toothpick into the center of one puto. If the toothpick comes out clean, they are ready. If not, steam for another few minutes and check again.
Step 5: Cool and Serve
Once your puto has steamed to perfection, it’s time to enjoy your homemade creation!
- Remove from the steamer: Carefully lift the steamer basket and set it aside. Let the puto cool in the molds for 5 minutes, allowing them to firm up slightly.
- Release the puto: Gently run a knife or spatula around the edges of each mold to loosen the puto. Carefully pop them out onto a serving plate.
- Serve warm: Puto is best served warm when the texture is soft and fluffy. If you added cheese or salted egg, the toppings will have slightly melted into the puto, adding an extra layer of flavor.
- Store leftovers: If you have any leftover puto, store them in an airtight container at room temperature for up to two days, or in the refrigerator for up to a week. To reheat, simply steam them for a few minutes or pop them in the microwave for 20-30 seconds.
Tips for Making the Best Filipino Puto

Making the perfect Filipino puto may seem simple, but with a few tips and tricks, you can ensure your puto comes out light, fluffy, and full of flavor every time. Here are some essential tips to help you make the best Filipino puto:
Don’t Overmix the Batter
One of the most important things to keep in mind when making puto is to avoid overmixing the batter. When you mix the batter too much, you can knock out the air needed for a fluffy texture. Overmixing causes gluten development (even in rice flour), leading to a denser and tougher cake. Instead, mix the ingredients just until combined to maintain a light, tender, and airy consistency.
Use Fresh Ingredients
The freshness of your ingredients is critical to the success of your puto. Old or expired baking powder won’t provide enough leavening power, resulting in flat, dense cakes. Similarly, using fresh rice flour ensures that the texture stays soft and fluffy. Always check the expiration dates on your ingredients, especially the baking powder and rice flour, to ensure your puto rises properly and has the right texture.
Control the Steaming Temperature
Proper steaming is key to making perfect puto. Make sure that the water in your steamer is simmering gently rather than boiling aggressively. If the water boils too vigorously, the excess steam can cause the puto to crack or become dry. Simmering steam allows the puto to cook evenly, keeping it moist and tender. Additionally, wrapping the steamer lid with a towel helps prevent condensation from dripping onto the puto, which could affect its appearance and texture.
Common Mistakes to Avoid When Making Filipino Puto
Although the recipe for Filipino puto is straightforward, a few common mistakes can affect the outcome. Avoid these errors to make sure your puto comes out perfect every time.
Using All-Purpose Flour Instead of Rice Flour
One of the most frequent mistakes is substituting rice flour with all-purpose flour. While it might seem like an easy switch, the texture and taste of the puto will be completely different. Rice flour gives puto its characteristic lightness and slightly chewy texture, while all-purpose flour results in a denser, more bread-like cake. Stick to rice flour for the authentic, soft texture that makes Filipino puto so special.
Steaming the Puto for Too Long
Oversteaming your puto can lead to a dry, tough texture instead of the soft and fluffy consistency you’re aiming for. Puto generally only needs 10-15 minutes of steaming, depending on the size of the molds. After 10 minutes, start testing the puto by inserting a toothpick into the center. If it comes out clean, your puto is done. Steaming for too long will dry out the puto and make it lose its delicate texture.
Skipping the Grease
Forgetting to grease your molds is a mistake that can ruin an otherwise perfect batch of puto. Without greasing, the batter will stick to the molds, making it difficult to remove the puto cleanly after steaming. Use a small amount of oil or butter to lightly coat each mold before pouring in the batter. This not only ensures easy removal but also keeps the puto looking smooth and beautiful when served.
Mastering this Filipino puto recipe allows you to bring a taste of Filipino culture right into your kitchen. Whether you make it plain, with cheese, or try one of the many variations, puto is a versatile and delicious treat that can be enjoyed by people of all ages. With the right ingredients and techniques, you can create soft, fluffy, and flavorful puto that will delight your family and friends.
FAQ
Can I Use Regular Flour Instead of Rice Flour?
While you can use regular flour, the texture of the puto won’t be the same. Rice flour is what gives puto its characteristic fluffiness.
What Can I Do If My Puto Turns Out Dense?
A dense puto is often the result of overmixing the batter or oversteaming. Make sure to mix the ingredients gently and follow the steaming time precisely.
Can I Add Flavors to the Puto Batter?
Yes, you can experiment with flavors by adding vanilla extract, pandan essence, or even grated coconut into the batter.
Can I Freeze Puto for Later?
Yes, you can freeze puto. Just let it cool completely, wrap it tightly in plastic wrap, and freeze for up to a month. To reheat, steam the frozen puto until warmed through.
Why is My Puto Sticking to the Mold?
To prevent sticking, make sure to grease the molds lightly before pouring in the batter. Silicone molds also help reduce sticking issues.
